Dumping BIOS
This page helps you dump the BIOS files from your PlayStation 2 console.
These files are proprietary software and must therefore be dumped from your own console. PCSX2 cannot play games without a BIOS, and no open-source alternative exists. However, thanks to the hard work of the homebrew community, dumping the BIOS today is a one-time, streamlined process.
- This guide assumes minimal technical knowledge.
- The PCSX2 project is happy to help with clarification where we can.
- Please reach out on our Discord server or on our forum with any questions.
Overview
Dumping your PlayStation 2 BIOS is conceptually a two-step process:
- Modify the operation of your PS2 so that it can run any program.
- Run a BIOS dumper utility program on your PS2 that reads its BIOS and writes it to an external device such as a USB drive.
Modifying Your PS2
First, you will need to modify your PlayStation 2 device's operation so that it can run a BIOS dumping program. Below are several methods to accomplish this, among which we most heavily recommend FreeMcBoot or FreeDVDBoot. These two are software modifications ("softmods") which live on a PS2 memory card and DVD, respectively, and do not permanently alter your PlayStation 2 console. Fortuna is a similar softmod to FreeMcBoot, but it is somewhat harder to find and use.
| FreeMcBoot | Fortuna | FreeDVDBoot | Disc swap exploit | Modchip | |
|---|---|---|---|---|---|
| Skill | Very low | Low | Low | Advanced1 | Expert2 |
| Price | ~15 USD | ~15 USD | Free | PS2 game disc | ~10–60 USD |
| Compatibility | All fat models and all but the newest slim models3 | All slim models | Many slim models and some fat models | Unknown | Unknown |
| Materials | FreeMcBoot memory card4 | Fortuna memory card5 | Blank DVD | Swap tool (find and refer to a guide), PS2 game disc, blank DVD, various software | Modchip, documentation, wires, various tools, soldering iron |
| Risk | Minimal | Minimal | Minimal | Moderate | High |
| Recommended? | Yes | For slim models that don't work with FreeMcBoot3 | Yes | No | Only for experienced solderers who want to do more than dump their BIOS |
- An active modchip may cause an incomplete or corrupted BIOS dump.
- To guarantee an accurate BIOS dump:
- Use your modchip to install FreeMcBoot or Fortuna.
- Disable your modchip and use uLaunchELF to launch biosdrain as described below.
- Refer to your modchip's documentation to see what button combination disables your modchip.
Downloading biosdrain
The download for the latest stable release of biosdrain is here.
The BIOS dumper utility we recommend is biosdrain. It will run on your PS2 during the dumping process but does not in any way alter your PS2. The instructions below assume you're using this tool.
Starting uLaunchELF
FreeMcBoot and FreeDVDBoot bundle a generally useful homebrew program, uLaunchELF,6 that lets you browse memory cards, DVDs, and USB drives connected to your PS2 and run programs from them.
- Using FreeMcBoot
- Using FreeDVDBoot
- Insert the FreeMcBoot memory card into Memory Card Slot 1.
- Make sure the disc tray is empty.
- Turn on your PS2.
- Select uLaunchELF from the menu.
- Download the ISO which corresponds to your PS2 model from FreeDVDBoot's GitHub repository.
- Burn the ISO to a DVD.
- The most generally reliable media is a DVD-R disc burned at a slow speed (e.g. 4X speed).
- Make sure your PS2's language is set to English.
- Place the burned FreeDVDBoot disc into your PS2.
- Reset/turn on your PS2.
- uLaunchELF should open.
Dumping the BIOS
Creating the BIOS Dump
biosdrain supports dumping both to a USB flash drive and via HOST through ps2link. We recommend USB for most users. If your console does not have networking support, you cannot use the ps2link method.
- USB Flash Drive
- ps2client & ps2link
- XLink & ps2link
- Some incompatibilities exist between certain USB drives and PS2 USB drivers.
- If your USB drive is not detected by uLaunchELF (
mass:is empty) please try another flash drive, preferably USB 2.0.
- If your USB drive is not detected by uLaunchELF (
- USB transfer on the PlayStation 2 is slow. Please be patient.
To use the USB method, you will need a USB flash drive which is partitioned as master boot record (MBR) and formatted with a FAT32 filesystem. On Windows, we recommend the free and open-source tool Rufus. Rufus is a powerful tool which can easily cause permanent data loss if misused. You can now exit Rufus and proceed. On macOS, we recommend the built-in Disk Utility application. Disk Utility is a powerful tool which can easily cause permanent data loss if misused. You can now exit Disk Utility and proceed. On Linux, we recommend KDE Partition Manager or GNOME Disks. KDE Partition Manager is an application built into KDE Plasma for managing storage devices. KDE Partition Manager is a powerful tool which can easily cause permanent data loss if misused. Many distros also have a graphical package manager. You can now exit KDE Partition Manager and proceed. GNOME Disks is an application built into GNOME for managing storage devices. GNOME Disks is a powerful tool which can easily cause permanent data loss if misused. Many distros also have a graphical package manager. You can now exit GNOME Disks and proceed.Expand to see a guide on formatting your flash drive
Start.![A Rufus window after formatting a USB flash drive. The Drive Properties section begins with a Device field which is filled with the selection USB Flash Drive (D:) [256 GB]. Beneath that, the Boot selection is Non bootable. Beneath that, the partition scheme is MBR, and the Target system is BIOS or UEFI. Beneath that is a Show advanced drive properties dropdown which is hidden. Beneath that is the Format Options section header. Beneath that is the Volume label, which is named USB Flash Drive. Beneath that, the File system selection is Large FAT32 (Default), and the Cluster size is 32 kilobytes (Default). Beneath that is a Show advanced format options dropdown which is hidden. Beneath that is a green status bar which says READY. Beneath that is a globe icon, an information icon, a slider bar icon, and a notebook icon. To the right of those icons are a Start button and a Close button. At the bottom, Rufus says 1 device found and shows a format time of 00:00:04.](/assets/images/rufus-8ce7fbcce79ad70bbc5a0d5cf5a4333b.webp)
View > Show All Devices.Erase.Erase.Erasing "[DRIVE]" and creating "[NEW VOLUME]".Done.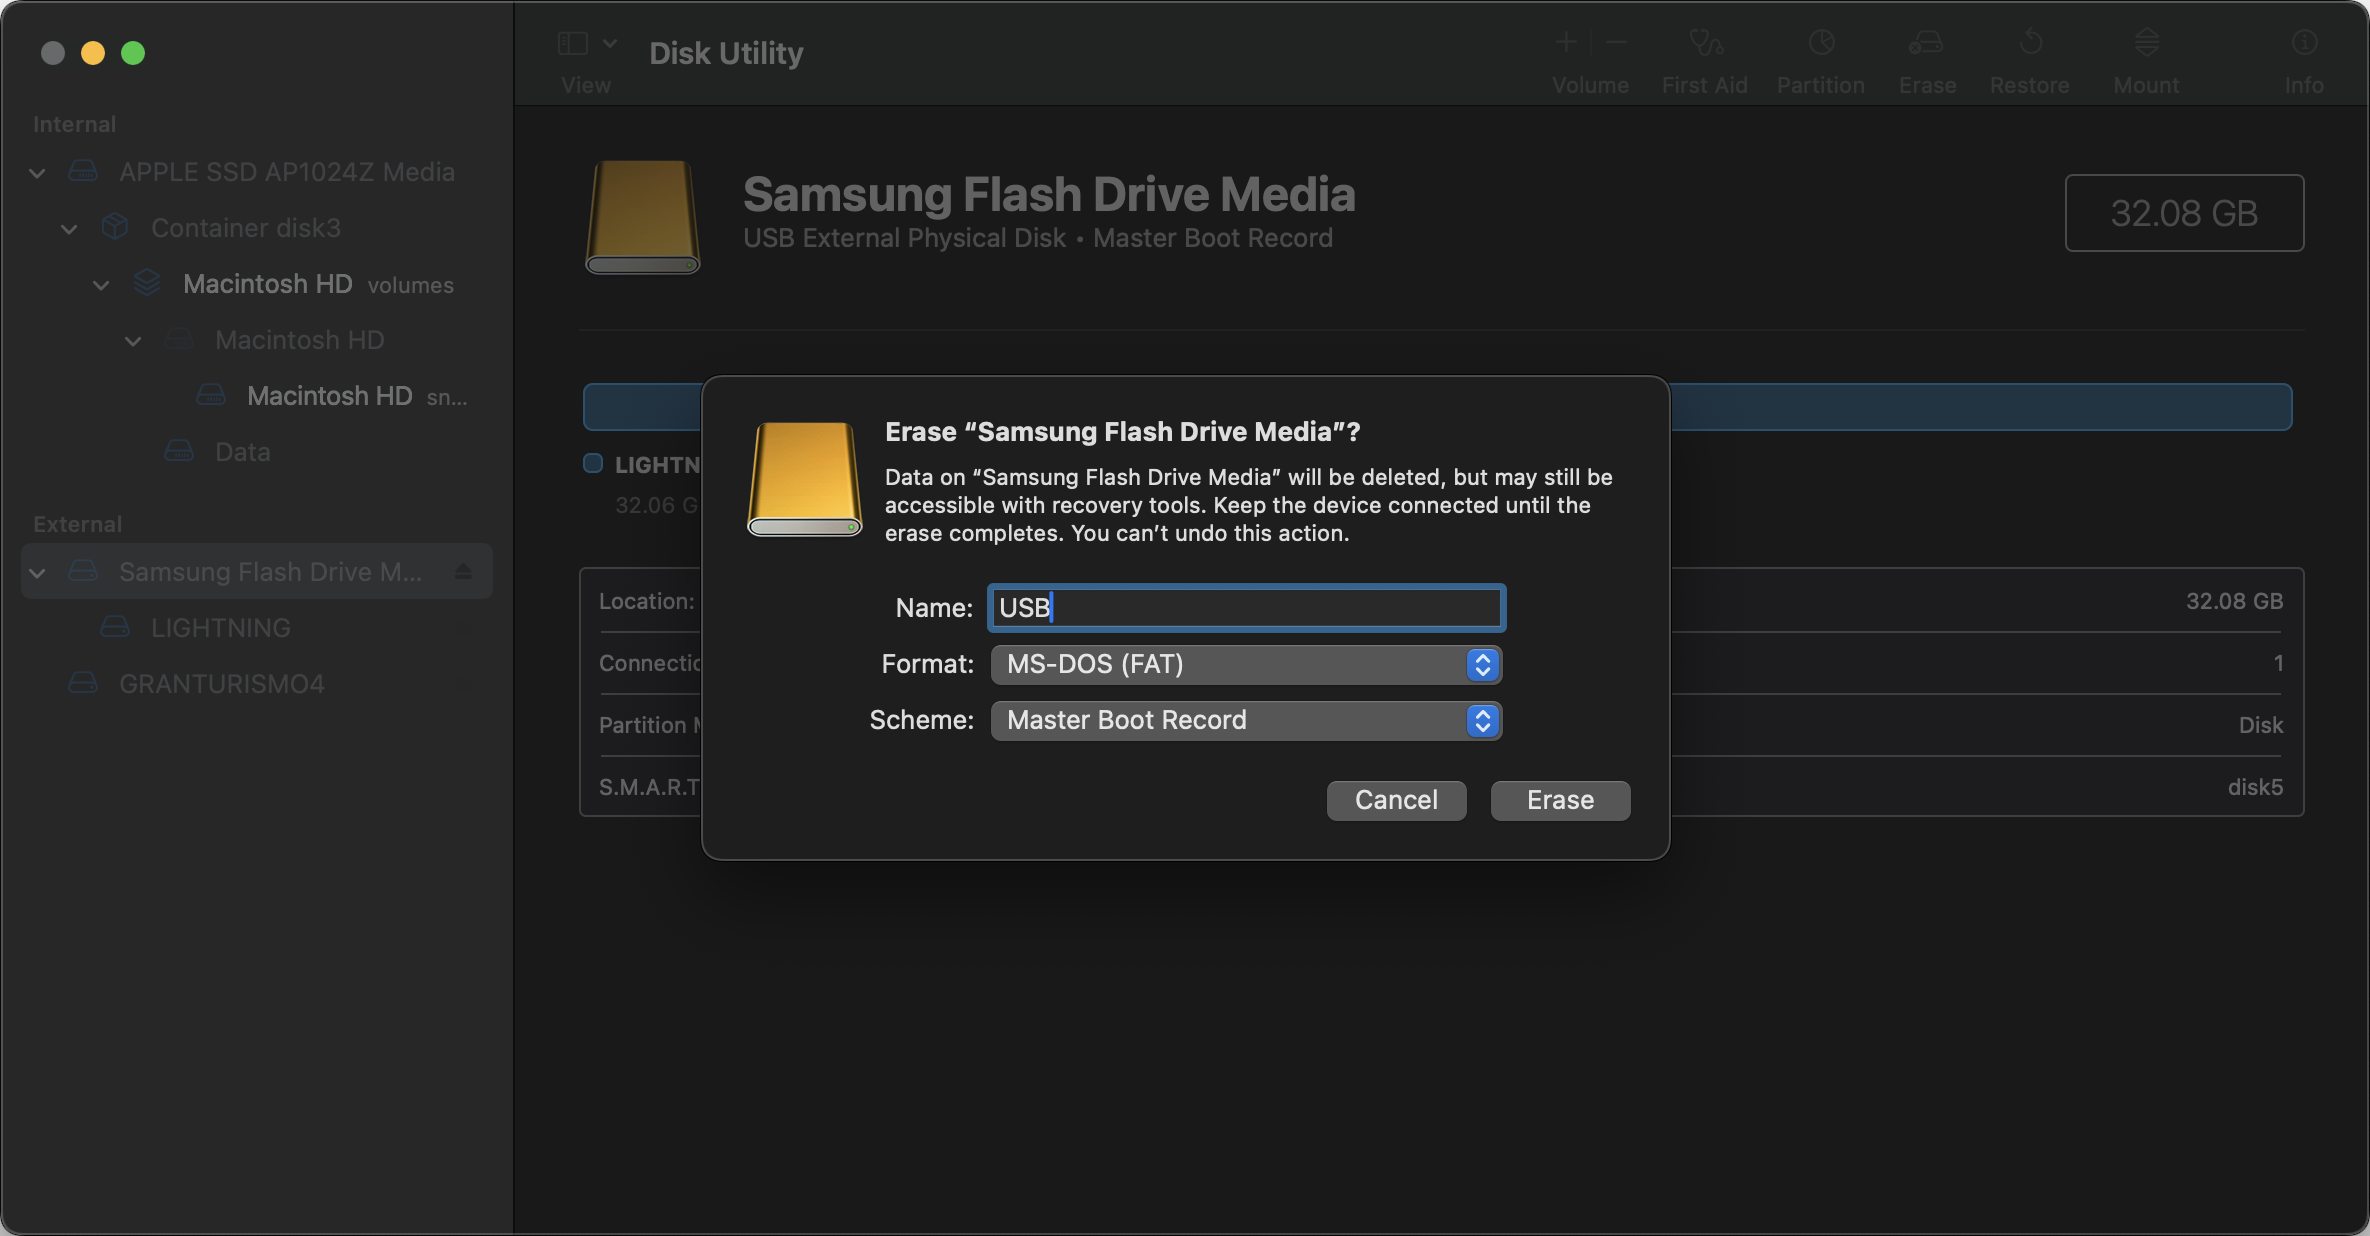
fdisk.
sudo apt install partitionmanagersudo dnf install partitionmanagersudo pacman -S partitionmanagersudo zypper install partitionmanager
New Partition Table.Create New Partition Table.New in the menu.OK.Apply.Apply Pending Operations.OK.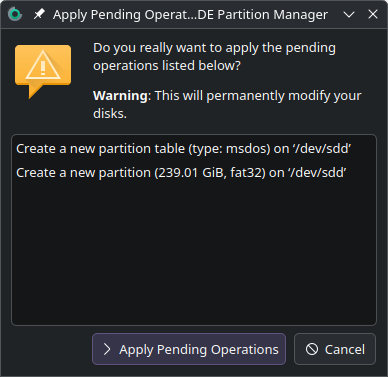
sudo apt install gnome-disk-utilitysudo dnf install gnome-disk-utilitysudo pacman -S gnome-disk-utilitysudo zypper install gnome-disk-utility
Format Disk....Format....Next.Create.
- Transfer the
biosdrain.elffile to your formatted USB flash drive. - Insert your USB flash drive into your PS2.
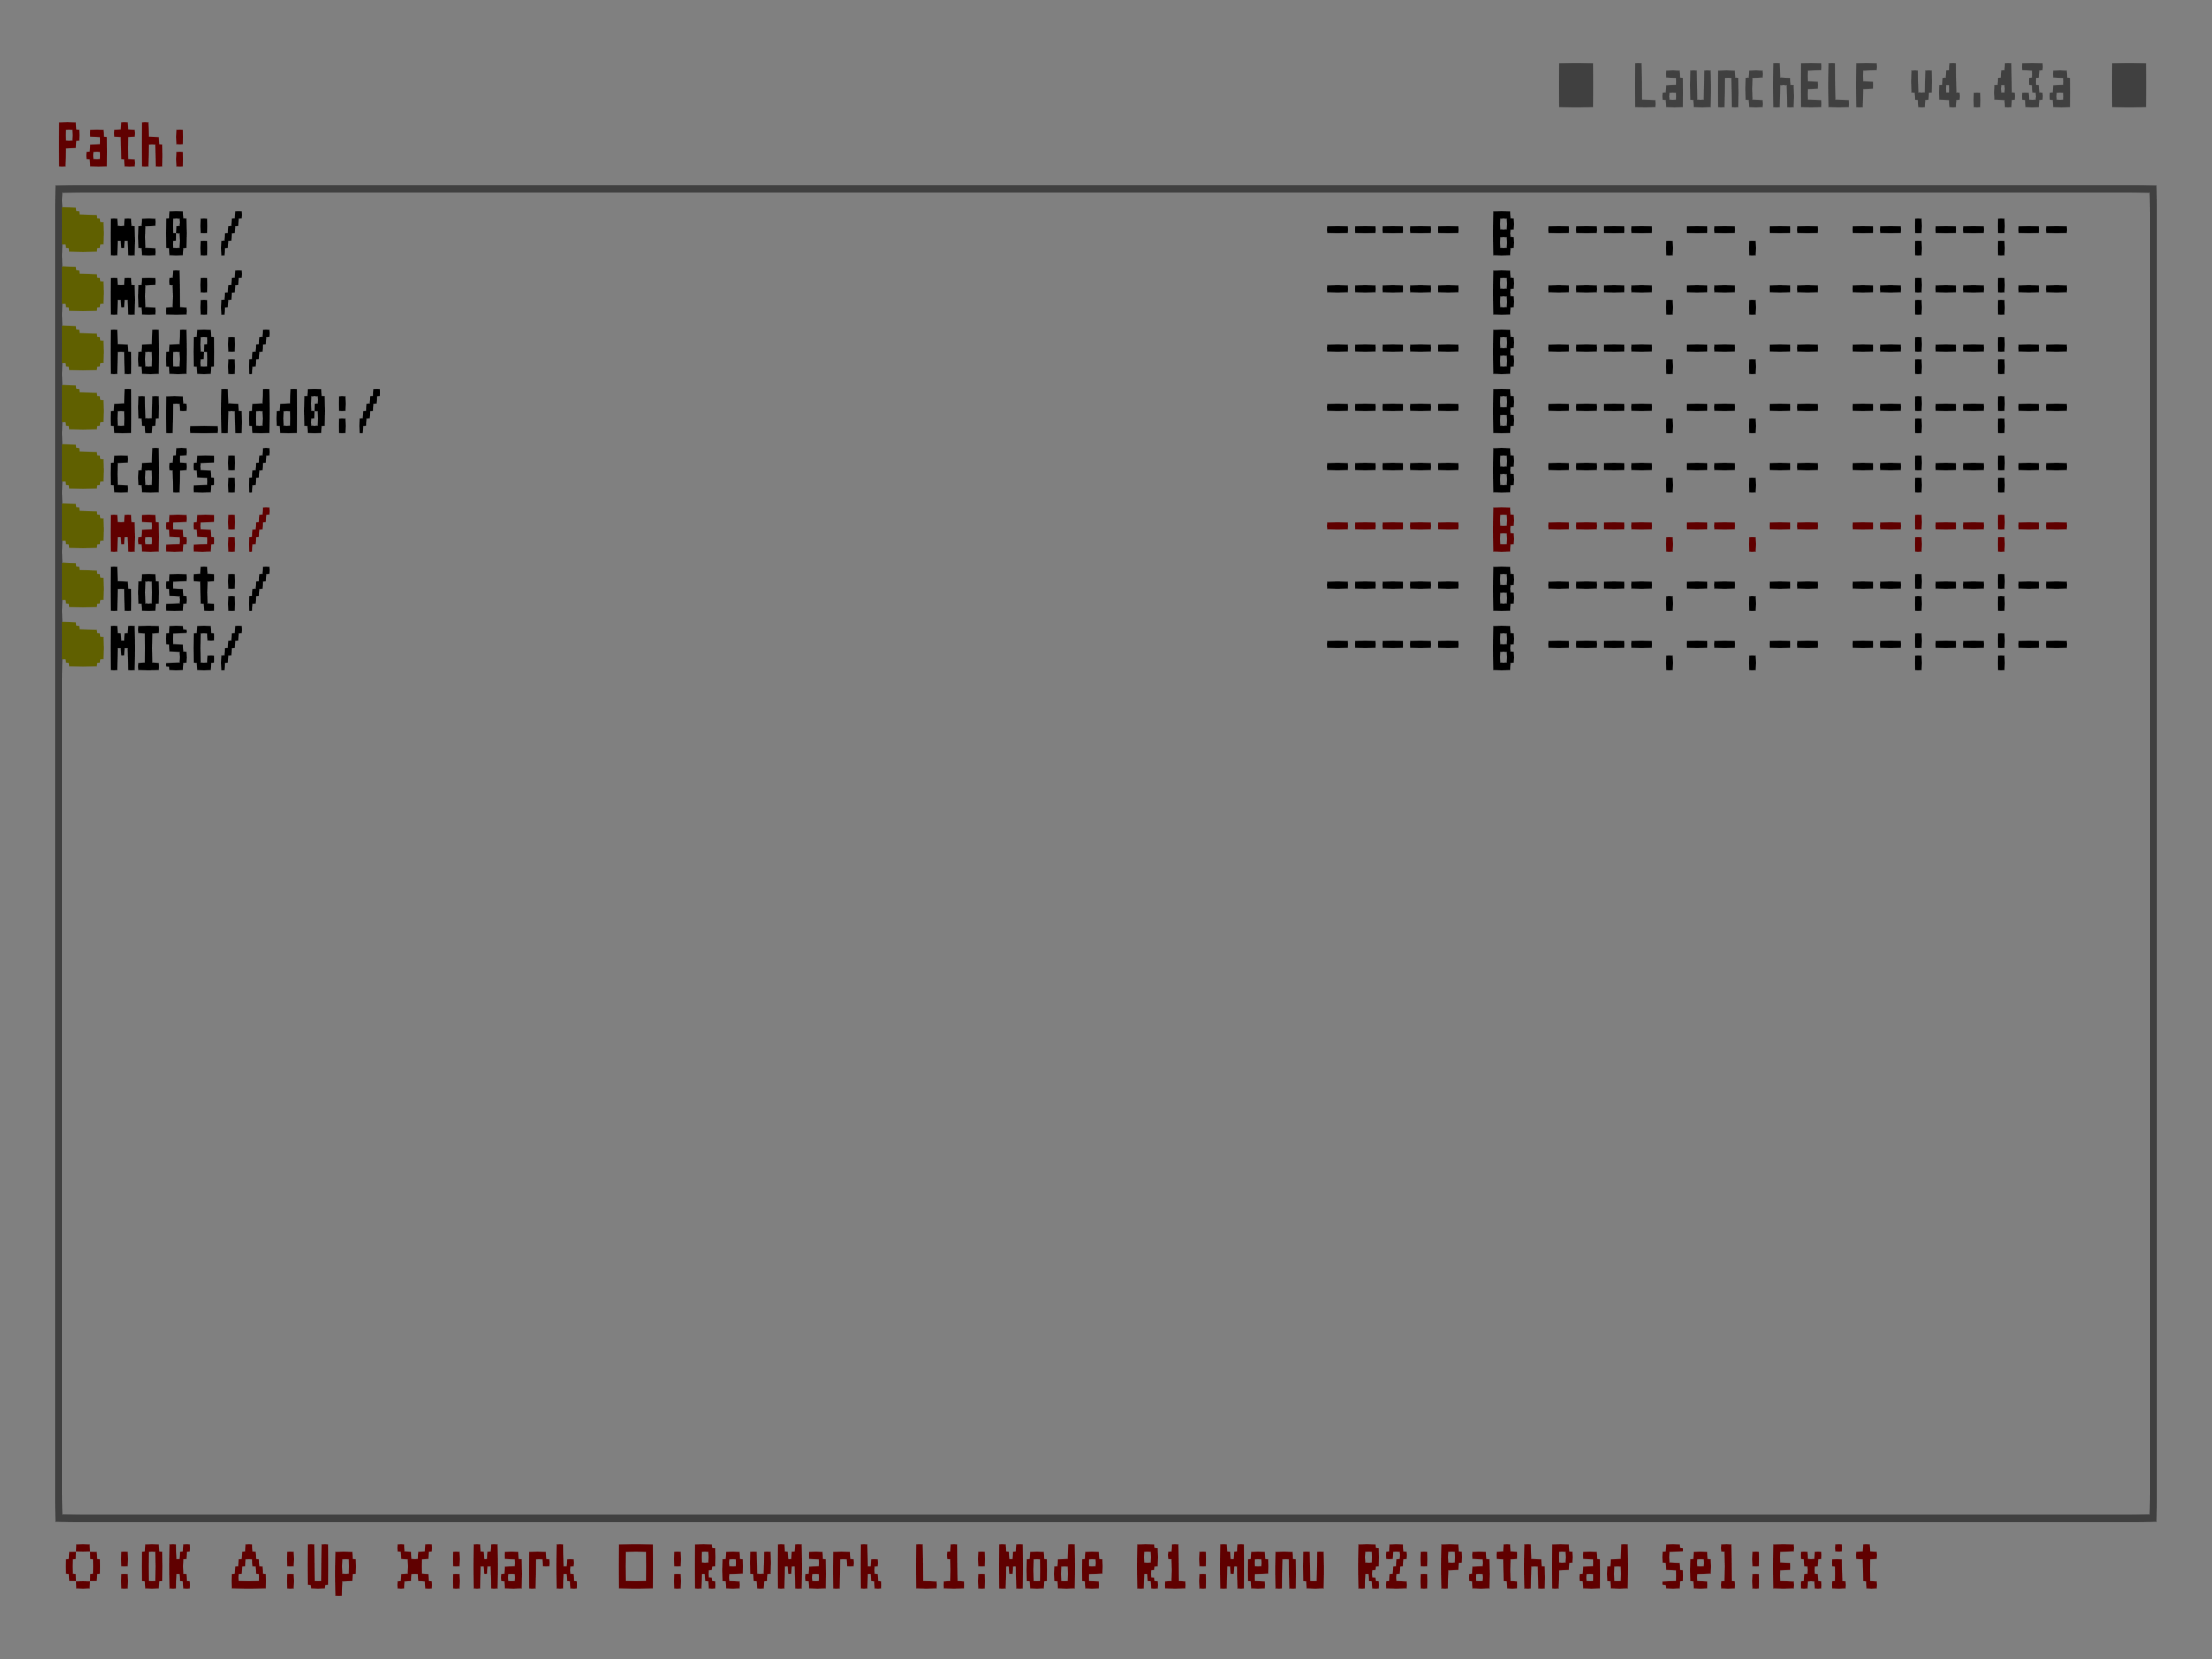
- In uLaunchELF, navigate to the device named
mass:and open it. - Locate and run
biosdrain.elf. - When biosdrain says "Finished Everything", the dumping process is finished.
- You can now plug the USB drive back into your computer.
You should see files prefixed by your console model ID and ending in .rom0,.rom1,.nvm, etc., on your USB drive.
cdinto the directory where you havebiosdrain.elf.- Run the command:
ps2client execee host:biosdrain.elf - biosdrain will automatically detect that the
hostdevice is present and dump your BIOS contents to the root directory ofhost.- The root of
hostis usually where you have the biosdrain.elf file.
- The root of
- When biosdrain says "Finished Everything", the dumping process is finished.
You should see files prefixed by your console model ID and ending in .rom0,.rom1,.nvm, etc., in the root directory of host.
- Execute the
biosdrain.elfwith the user interface. - biosdrain will automatically detect that the
hostdevice is present and dump your BIOS contents to the root directory ofhost.- The root of
hostis usually where you have the biosdrain.elf file.
- The root of
- When biosdrain says "Finished Everything", the dumping process is finished.
You should see files prefixed by your console model ID and ending in .rom0,.rom1,.nvm, etc., in the root directory of host.
Checking the BIOS Dump
Once you've finished dumping your PS2's BIOS, you're done and ready to use it for PCSX2. However, if you wish to first verify the integrity of the dump, the ReDump project maintains a data file containing hashes for every PS2 BIOS version. To compute the SHA1 hash of the BIOS file you dumped:
- Windows
- macOS
- Linux
On Windows, use Get-FileHash in PowerShell:
Get-FileHash [path-to-file] -Algorithm SHA1
On macOS, use shasum in Terminal:
shasum [path-to-file]
On Linux, use sha1sum in the shell:
sha1sum [path-to-file]
Some file managers such as Dolphin (KDE) provide built-in support for hashing, while some like Files (GNOME) require an extension.
Footnotes
Footnotes
-
For more information on disc swap, see this section on the PS2 Dev Wiki. ↩
-
For more information on modchips, we recommend this article by FreeckyCake on Altar of Gaming and this catalogue on the PS2 Dev Wiki. ↩
-
Memory cards with FreeMcBoot preinstalled are sold on a variety of digital storefronts. ↩
-
Memory cards with Fortuna preinstalled can also be found on digital storefronts, but they are rarer than FreeMcBoot. A modern, open-source version of Fortuna, OpenTuna, is not typically bundled with memory cards sold by online retailers. ↩
-
The modern continuation of uLaunchELF, wLaunchELF, is sometimes bundled with modern versions of FreeMcBoot like 1.966. It is not bundled with FreeDVDBoot, which still includes uLaunchELF. This guide treats uLaunchELF and wLaunchELF interchangeably. ↩